The option to force PC clock synchronization was introduced in Windows 10 with the May 2019 Update, which is released by the company recently. This particular option is useful when the computer loses synchronization with Microsoft servers and shows a wrong time.
How to Sync Clock in Windows 10
Here’s what you need to do to manually synchronize the system clock in Windows 10 :
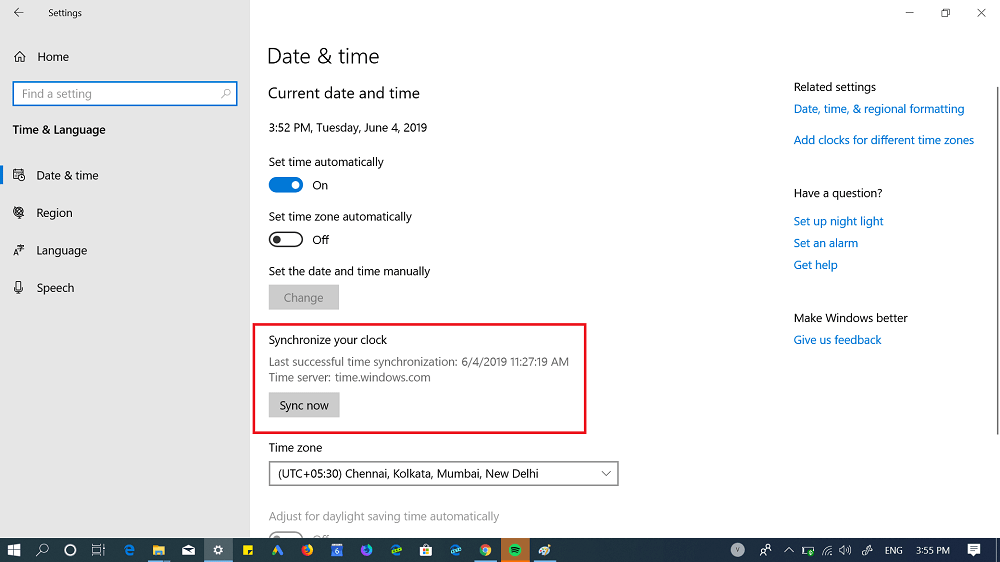
- Open the Settings. You can launch it from the Start menu or use the (Win + I).
- Go to Time & Language > Date and time.
- On th right side, you need to head over to the option “Synchronize your click.” Under this, you will find a button labeled as Sync now. Note: Make sure, you computer is connected to internet connection. This way the PC will connect to the time.windows.com server and show the correct current time. From here you can also find out when the last successful synchronization of the time took place. Were you aware of this Clock Synchronization feature of Windows 10? Have you ever encountered problems with the clock on your PC? Let us know your opinion in the comments. Source – WindowsBlogItalia