With default settings, rejuvenating picture or background will be set as a lock screen background in Windows 11. In case, you didn’t like the current background, then you can set it to Windows spotlight, image, or a slideshow to see the amazing background. For that, you have to go to Settings > Personalization > Lock Screen. Here on the right side, using the “Personalize your lock screen” drop-down, select one of the options discussed above.
How to Disable Option “Change Lock Screen Background” in Windows 11
Apart from that, there might be a group of users who wants to completely disable the option to change the Windows 11 Lock Screen for their personal reasons. If you’re one out of them, then here’s how you can do that: To apply the changes mentioned in the post below, you must be signed as an administrator on your Windows 11 PC
Method 1: Use Local Group Policy Editor
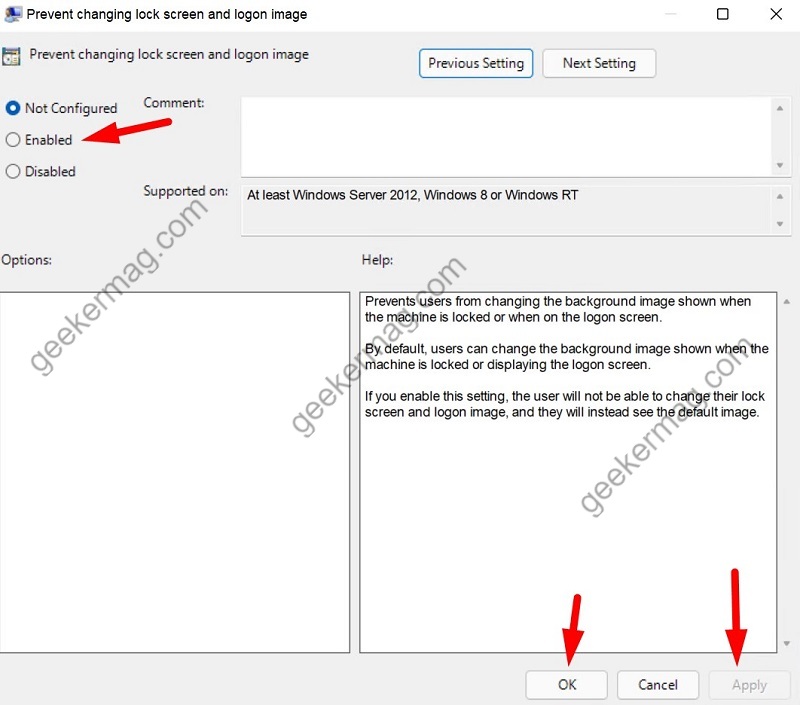
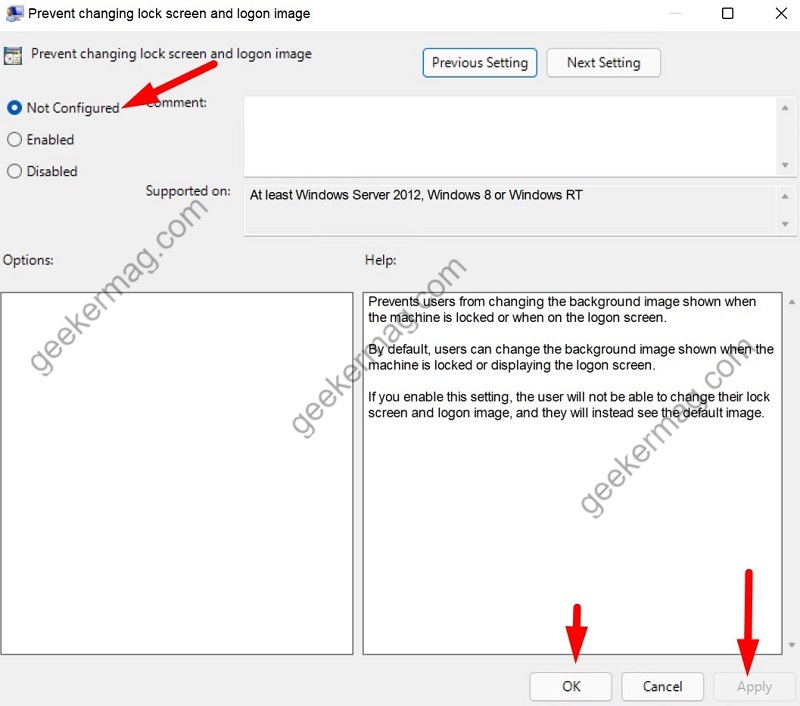
The Local Group Policy Editor method is applicable for users running Windows 11 Pro, Enterprise, and Education editions. Press Windows button on your keyboard, then search for gpedit.msc, and when Local Group Policy Editor appears in the results click to open it. Now navigate to the following location: Computer Configuration > Administrative Templates > Control Panel > Personalization In the right sidebar, find the option called “Prevent changing lock screen and logon image“. Double click on it to edit it. If you want to disable changing Lock Screen background option then click on the Enabled option and then Apply/OK. If you want to enable changing the lock screen background option, Select Not Configured, then click on Apply and OK. Close the Local Group Policy Editor and Restart your computer. Now if you have disabled lock screen background, you can’t access the option in Windows settings.
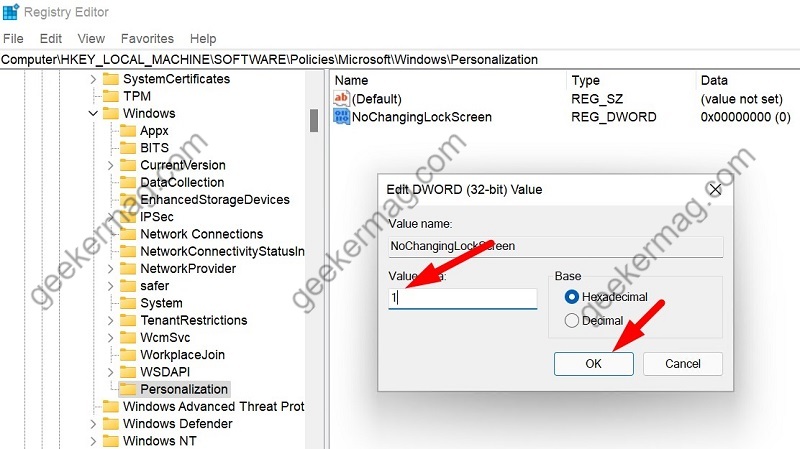
Use Registry Editor
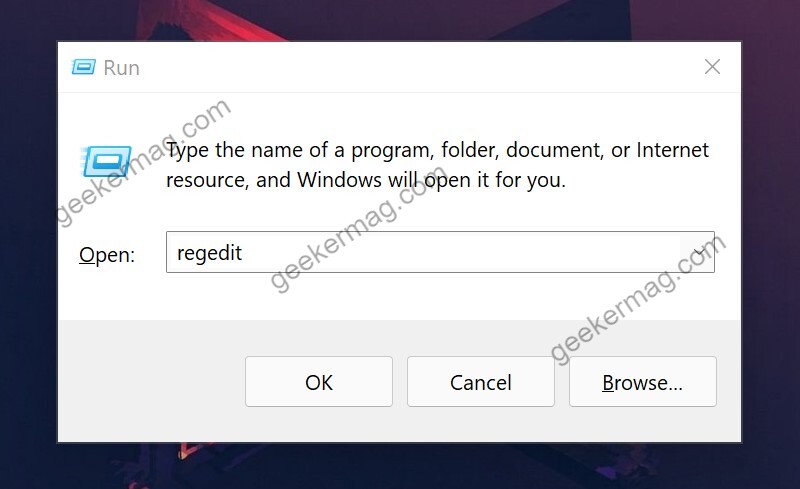
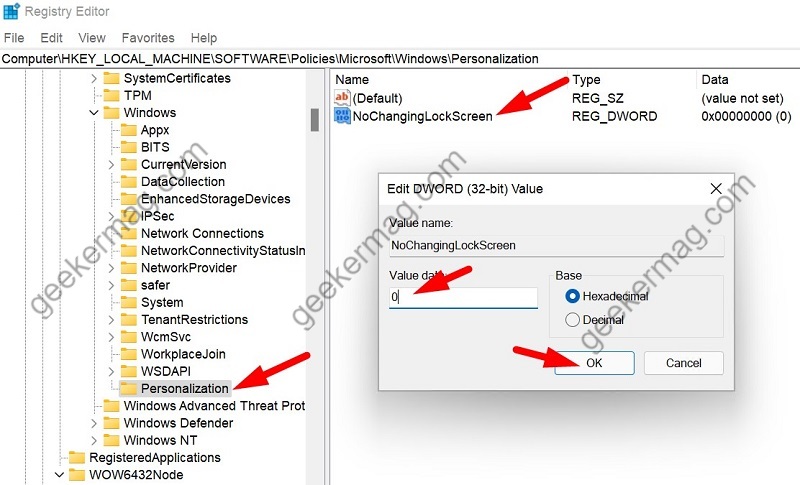
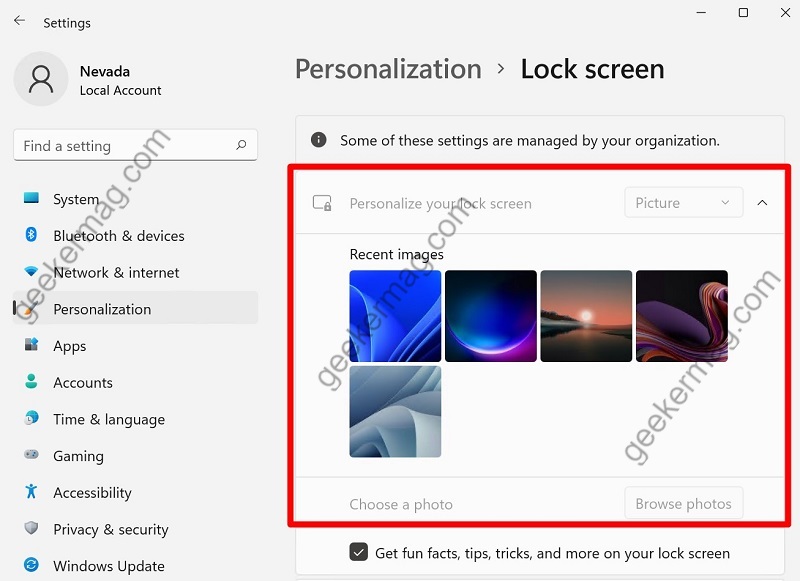
As Windows 11 Home edition lack Group Policy editor, this method is specially applicable for those users, while other editions users can use this method as well. Press Windows + R to open the Run command and then type regedit. Press enter to open Registry Editor. Navigate to the following location: HKEY_LOCAL_MACHINE\SOFTWARE\Policies\Microsoft\Windows\Personalization In the right sidebar, find the NoChangingLockScreen option and double-click on it to open it. Change its value data to 0 for enabling changing the lock screen background and press OK. If you want to disable changing the lock screen background then change its value data to 1 and press OK. After using one of the methods discussed above, if you head over to Windows 11 Lock screen personalization settings, you will notice that Personalize your lock screen option is grayed out or you change the lock screen background. Check the screenshot below: At any point, if you want to restore the option to change Lock screen background in Windows 11, then you can also do that by undoing the changes.